


Preserving Garden Herbs: Hanging to Dry and Oven Drying Techniques
- Jul 7, 2025
- 3 min read
Updated: Jul 8, 2025
Preserving your garden herbs is a must for any home gardener or cooking enthusiast who wants to keep that fresh flavor alive all year round. Herbs like basil, oregano, rosemary, thyme, tarragon, and dill can really jazz up your dishes, but fresh herbs don’t last forever. So, let’s dive into two fun and easy methods to dry them out: hanging them up and using the oven. Each method has its perks, so pick what suits your vibe!

This site contains product affiliate links. We may receive a commission if you make a purchase after clicking on one of these links. As an Amazon Associate, I earn from qualifying purchases. For more info, click here.
🌿 Hanging to Dry
(Air-Drying)
Best for: oregano, rosemary, thyme, tarragon, dill & sage
Hanging herbs to dry is the classic way to do it! It’s super simple and lets those essential oils and flavors shine. Here’s how to nail it:
1. Harvesting: Grab some fresh, healthy stems from your herbs. Early morning is prime time for picking—after the dew has dried but before the sun gets too hot. This way, you’ll keep all that yummy flavor!
2. Preparing the Herbs: Give your herbs a gentle rinse to wash off any dirt or critters, then pat them dry with a towel. Make sure they’re totally dry to avoid any mold drama later on.
3. Bundling: Gather about 5-10 stems and tie them together with string or a rubber band. Leave some space between the stems for air to circulate—this is key for drying!
4. Choosing a Drying Location: Find a warm, dry, and dark spot to hang your herbs. A well-ventilated area away from sunlight is best since sunlight can mess with the flavor and color. Think attics, closets, or even a cool herb drying rack.

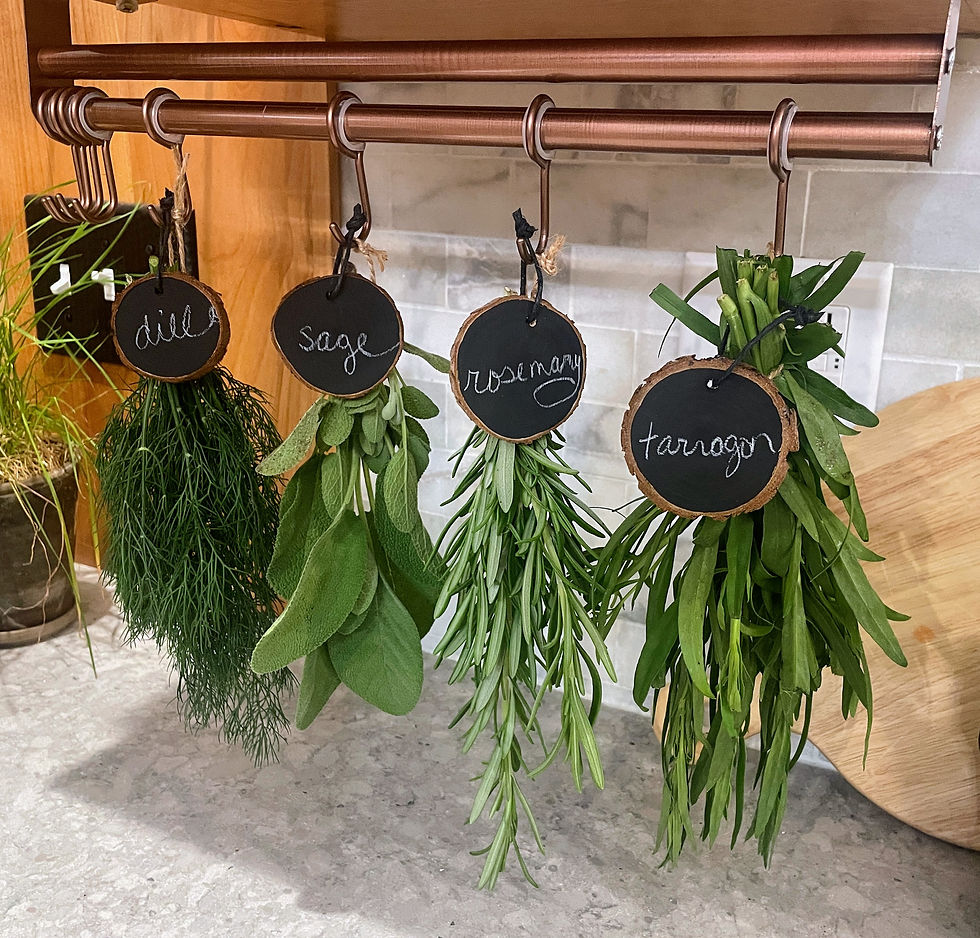
5. Hanging: Hang those bundles upside down using hooks, nails, or a clothesline. This way, moisture escapes from the stems instead of pooling in the leaves. No one wants soggy herbs! Don't forget to label them, some are hard to distinguish once they are shribbled up! I used wood disks with pre-drilled holes, black paint with white pencil (or chalk would work) for stylish flare.
6. Drying Time: Depending on the humidity and temperature, it can take anywhere from a few days to two weeks. Check on them regularly; they’re ready when they’re crispy and crumble easily!
7. Storing: Once dried, remove the leaves from the stems and stash them in airtight containers like glass jars or vacuum-sealed bags. Keep them in a cool, dark place to lock in that flavor!

🔥 Oven Drying
Best for: Basil, and useful for all herbs if you're short on time.
If you’re in a hurry, oven drying is your go-to! It’s quick and can have your herbs ready in just a few hours.
1. Preparation: Just like with hanging, start by harvesting and washing your herbs. Make sure they’re super dry to avoid steaming them in the oven.
2. Preheating the Oven: Preheat your oven to the lowest setting—around 170°F (77°C) or even lower if you can. This low heat helps keep those essential oils intact and prevents cooking.
3. Arranging the Herbs: Spread your washed and dried herbs on a baking sheet lined with parchment paper. Make sure they’re in a single layer without overlapping for even drying.

4. Drying Process: Pop the baking sheet in the oven and keep the door slightly ajar to let moisture escape. A wooden spoon works great for propping it open!

5. Monitoring: Check on your herbs every 15-30 minutes and give them a stir or flip to ensure they dry evenly. It’ll take about 1 to 4 hours, depending on the herbs and how moist they are.
6. Cooling and Storing: Once they’re fully dried, take them out and let them cool completely. After that, store them in airtight containers and label them for easy access later!

Conclusion
Whether you’re hanging your herbs to dry or opting for the oven method, both are fantastic ways to keep that garden goodness alive. With these straightforward steps, you can savor the flavors of basil, oregano, rosemary, thyme, tarragon, and dill long after the growing season is over. Each method has its own charm, so feel free to experiment and find out which one works best for your kitchen adventures! Happy drying!


Comments